
Paper Fold Product Reveals: Full Image or Subject Cutout?
Compare a full-image reveal and a subject cutout using the same product illustration, then learn when an uncertain edge makes the full image a better choice.
Last updated:
By: Ani Paper
A product reveal has two possible subjects: the product itself, or the whole scene around it. A subject cutout makes the object the focus. Animating the full image keeps its lighting, surface, and surroundings together. Choose between those treatments before adding stronger motion.
This walkthrough uses one original product illustration for both versions: a green reusable bottle labeled FIELD NOTES, with a thin carry loop above its cap. The comparison keeps the paper settings fixed so the useful difference is the image treatment, rather than a different size or a more energetic unfold.
Reproduce the comparison
First, download the source illustration, then open the Paper Fold editor. Upload it with Choose an image. The editor accepts JPEG, PNG, or WebP files up to 20 MiB.
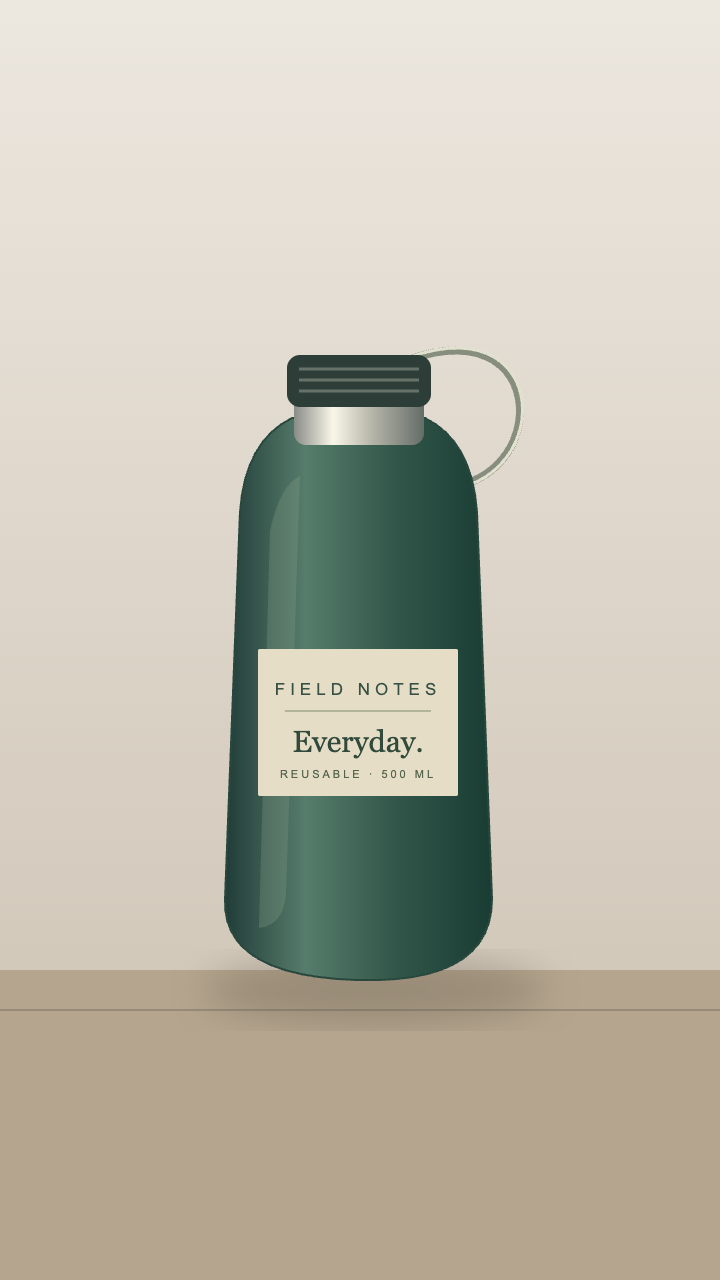
Use this same source for both attempts. Changing the crop between versions would make it harder to judge what subject selection changes.
For the full-image version, choose Use Full Image on the selection screen. Open Controls if the panel is closed, then set:
- Subject size: Medium.
- Paper edge: Clean.
- Unfold impact: Soft.
Preview the reveal before exporting. The full image is placed on the paper, so its existing background remains part of the composition.
For the cutout version, choose Select a subject and click on the green bottle body above the beige label. The first selection may need to download the local selection model. Inspect the cutout in the review screen, then choose Use this subject to compare the body selection. Keep Medium, Clean, and Soft for this version too. The review below explains why this source still favors Full Image for a finished reveal.
Compare what the viewer sees
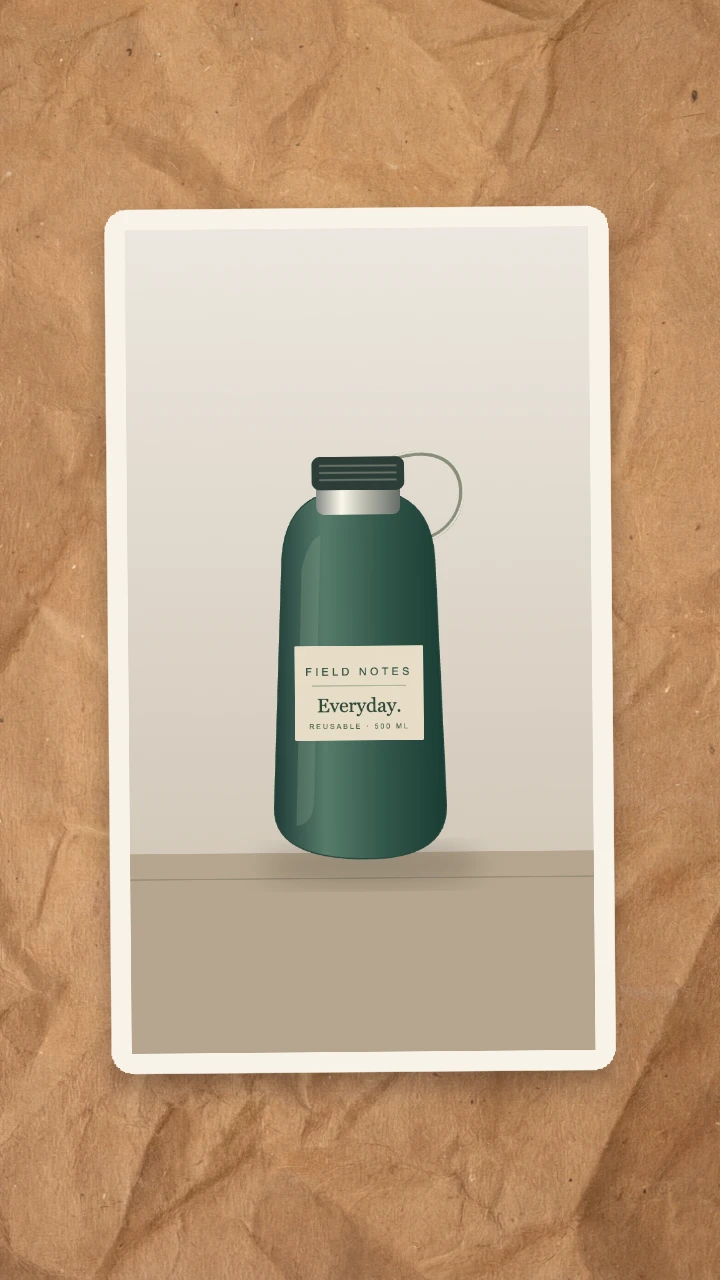
Full Image: the scene stays intact and unfolds as one printed rectangle.
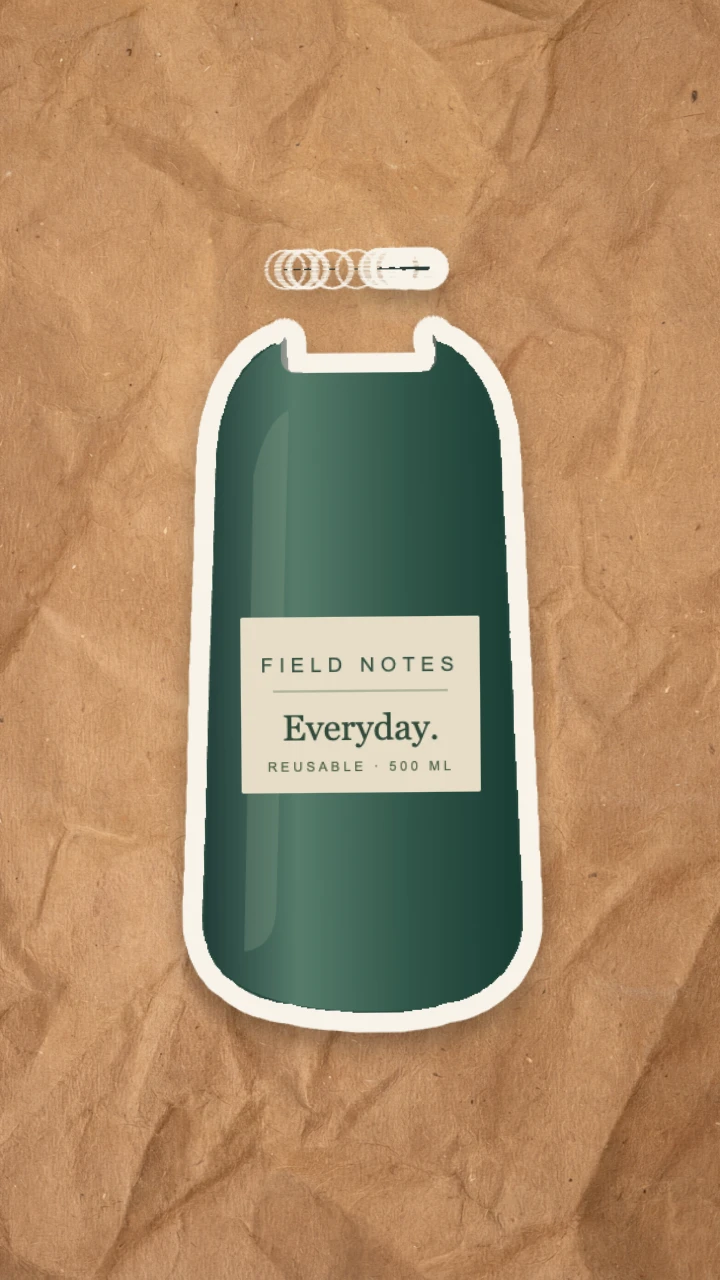
Body cutout: the background is removed, but the cap and carry loop are not intact, and small detached fragments remain above the body. This is an improvement over selecting only the label, not a complete product cutout.
In the full-image example, the horizontal surface line and the shadow below the bottle remain visible. They give the object a place to sit. Use this treatment when the surface, shadow, or setting explains the product. A packaging shot may need the surrounding scene to feel complete. It is also the dependable choice when the product has a subtle outline against the background.
The body cutout puts the bottle shape in the foreground, but its missing cap changes the product. For this source, Full Image is the better finished reveal if the cap and carry loop matter. A cutout is useful when the outline survives selection and the surroundings distract from it. Check small openings and protruding parts as carefully as the main body.
The Subject size control fits the selected content into the output frame. Keeping it at Medium in both versions does not guarantee that the product itself occupies identical pixels: the full-image bounds include its background, while the cutout bounds follow the selection. Compare the clarity of the product, rather than treating the two versions as a pixel-identical scale test.
Check what was selected before adding energy
Our first click landed in the center of the beige FIELD NOTES label. The selection kept only that label and dropped the entire green bottle. A crisp boundary is not enough: the selected region must be the object you meant to reveal.
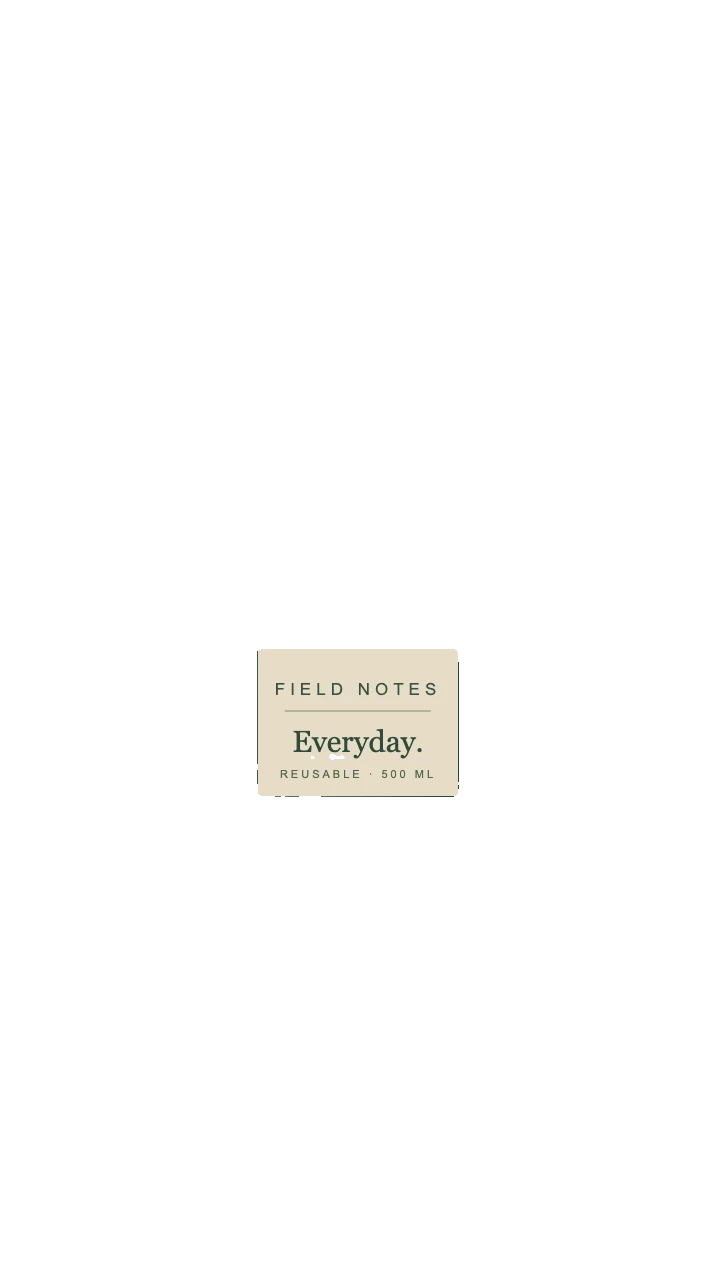
Actual first selection: clicking the label isolated the label, not the bottle. Reject this result before opening the fold effect.
We used Choose another object and retried on the green body above the label. That recovered the body and its label, but left out the cap and thin carry loop. The second click improved the selection without making it complete. Return to the selection screen and choose Use Full Image when those details are important.
For another source, inspect the same warning signs: a strip of background, a missing thin part, or an opening filled in as solid product. Judge the result against the source, not just against the first attempt.
Paper edge changes the paper treatment; it does not repair subject selection. Similarly, Unfold impact changes the motion's pace, shake, rebound, and shadow together. Increasing it can make an entrance more emphatic, but it does not make a weak product outline more accurate.
Once the selection works, try Snappy or Punchy if the edit calls for a stronger entrance. Watch the opening motion as well as the settled image. A small label or fine product detail needs to remain useful during the part of the clip you intend to keep.
Take the reveal into an edit
The output is a silent, 720 × 1280 vertical clip. Video (MP4) exports the four-second animation at 30 fps. GIF samples at 8 fps; the tested 32-frame GIF lasts 4.16 seconds because its frame delays are rounded. Use the MP4 for a video timeline, where you can trim the hold after the unfold and add sound alongside the rest of the edit.
Place the reveal before a closer product shot or a short statement of what changed. Check the exported clip at the size viewers will see on a phone. If the product needs a separate label to be understood, add that label in the surrounding edit instead of relying on tiny packaging text.
For an announcement led by a headline rather than a product image, follow the Press Coverage launch-opener guide. Return to all practical guides to choose another treatment.